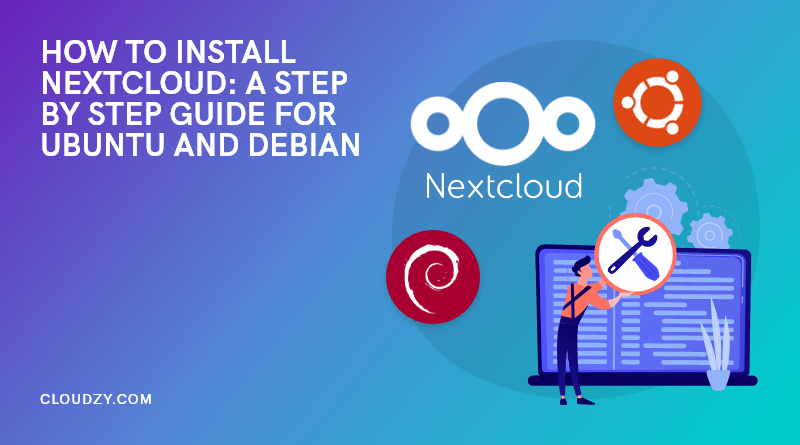
Many are moving away from mainstream options like Google Drive or Dropbox in favor of self-hosted solutions that let you manage your data on your own terms, and one solid option is Nextcloud.
This article will walk you through a complete step-by-step tutorial on how to install Nextcloud Docker on Ubuntu and Debian systems. It will cover everything from updating your system and installing dependencies to configuring your web server and PHP, setting up the database, and finalizing the installation with Nextcloud Docker Compose.
Why Self-Host Nextcloud?
Self-hosting Nextcloud means taking control of your own cloud storage solution instead of relying on mainstream services like Google Drive or Dropbox. With Nextcloud, you have the freedom to store and share files on your terms, giving you full ownership of your data and complete control over privacy settings.
For many users, the ability to tweak and enhance the platform through plugins and integrations is a significant draw. Using Nextcloud docker and Nextcloud docker compose, you can quickly deploy a reliable, secure file-sharing system on popular systems as both Nextcloud Ubuntu and Nextcloud Debian are available.
This setup is a practical solution if you want to install Nextcloud without being tied to the limitations of third-party services. The process of Nextcloud docker install is designed to be straightforward, allowing even those who are not seasoned sysadmins to dive into self-hosting.
Adopting a Nextcloud Docker installation can also save money compared to commercial cloud solutions, since you’re mainly paying for your own hardware or server instance. Plus, the customization options available—like adjusting PHP settings or integrating a MySQL database—mean you can tailor the environment to suit your specific needs.
If you’re wondering how to install Nextcloud docker, there’s a host of community support and resources that offer Nextcloud docker compose example files, making the process both educational and rewarding.
Prerequisites
Before diving into the installation process, it’s smart to have your environment in good shape. This section covers the basics, from system requirements and server setup to the software dependencies for a smooth Nextcloud docker install:
| Component | Requirements/Options | Notes |
| Operating System | Ubuntu (22.04 LTS highly recommended, 24.04 LTS), Red Hat Enterprise Linux 9/8, Debian 12 (Bookworm), SUSE Linux Enterprise Server 15, openSUSE Leap 15.5, CentOS Stream, Alpine Linux | Nextcloud Ubuntu is popular |
| CPU & OS Architecture | 64-bit | Ensure CPU, OS, and PHP are 64-bit |
| PHP | PHP 8.3 (or other versions) | Use a 64-bit version to avoid compatibility issues |
| Memory | Minimum: 128MB RAM per process; Recommended: 512MB per process; Updater: 256MB | Adjust based on usage |
| Access | Root or sudo access | Required for system-level tweaks |
| Container Tools | Docker, Docker Compose | Simplifies installation and management |
| Web Server | Apache 2.4 (with mod_php or php-fpm recommended) or nginx with php-fpm | Choose based on personal or organizational needs |
| Database | MySQL (8.0/8.4), MariaDB (10.6/10.11 recommended, or 11.4), or PostgreSQL | Must support InnoDB and READ COMMITTED isolation level |
Step 1: Update and Prepare Your System
Before setting up your Nextcloud Docker instance, take a moment to get your system updated and install all the necessary tools. Think of this as tidying up your workspace before diving into a fun project. Follow these commands on your Nextcloud Ubuntu server:
Refresh Your Package List and Upgrade Packages:
Update your package repositories and upgrade installed packages with these commands:
| sudo apt update sudo apt upgrade -y |
Install Docker, Docker Compose, and Useful Utilities:
Get Docker, Docker Compose, and other handy utilities such as curl, wget, and build-essential by running:
| sudo apt install docker.io docker-compose curl wget build-essential -y |
(Optional) Add Your User to the Docker Group:
This step lets you run Docker commands without prepending sudo every time:
| sudo usermod -aG docker $USER |
After running this command, log out and back in to apply the changes.
Verify the Installations:
Check that Docker and Docker Compose are installed properly:
| docker –version docker-compose –version |
It’s also highly recommended to keep an eye on your Docker logs for troubleshooting, which you can check and manage by following these steps.
Now that your system is updated and all dependencies are in place, selecting a reliable hosting solution is a must. Cloudzy offers lightning-quick VPS services with up to 240 GB NVMe SSD storage (up to 2 TB with our GPU VPS) and 99.95% uptime, making it an excellent choice for hosting your Nextcloud instance.
Next, we’ll set up your web server and adjust PHP settings to make sure everything works smoothly with your Nextcloud Docker instance.
Step 2: Configuring Apache/Nginx and PHP
Now that your system is all set, it’s time to arrange the stage by configuring your web server and PHP. This section walks you through setting up Apache and Nginx along with the PHP adjustments that make your Nextcloud run smoothly in Docker.
Configuring Apache
If you’re using Apache, follow these steps:
Create a Configuration File:
- Open a new file for Nextcloud:
| sudo nano /etc/apache2/sites-available/Nextcloud.conf |
- Inside this file, add something like:
| Alias /Nextcloud “/var/www/Nextcloud/”
<Directory /var/www/Nextcloud/> <IfModule mod_dav.c> |
Activate the Site:
- Enable your new configuration:
| sudo a2ensite Nextcloud.conf |
Enable Required Apache Modules:
- Run these commands to activate the necessary modules:
| sudo a2enmod rewrite sudo a2enmod headers sudo a2enmod env sudo a2enmod dir sudo a2enmod mime |
If you plan to use PHP-FPM with Apache (using mod_fcgi), also activate:
| sudo a2enmod setenvif |
Enable SSL (Optional):
- For a secured connection, activate SSL with:
| sudo a2enmod ssl sudo a2ensite default-ssl sudo service apache2 reload |
Configuring Nginx
- For Nginx users, the setup involves creating a server block:
Create a Server Block File:
- Open a new file:
| sudo nano /etc/nginx/sites-available/Nextcloud |
- Paste a sample configuration like:
| server { listen 80; server_name your-server-ip or cloud.example.com;root /var/www/Nextcloud/; index index.php index.html /index.php$request_uri;location / { try_files $uri $uri/ /index.php?$args; }location ~ \.php$ { fastcgi_split_path_info ^(.+\.php)(/.+)$; fastcgi_pass unix:/run/php/php8.3-fpm.sock; fastcgi_index index.php; include fastcgi_params; fastcgi_param SCRIPT_FILENAME $document_root$fastcgi_script_name; } } |
Activate the Configuration:
- Create a symbolic link to enable the site:
| sudo ln -s /etc/nginx/sites-available/Nextcloud /etc/nginx/sites-enabled/ |
Test and Reload Nginx:
- Check your configuration and reload:
| sudo nginx -t sudo systemctl reload nginx |
Tweaking PHP Settings
Nextcloud depends on PHP with certain settings. Adjust these by editing the appropriate PHP configuration file:
For Apache with PHP:
| sudo nano /etc/php/8.3/apache2/php.ini |
For Nginx with PHP-FPM:
| sudo nano /etc/php/8.3/fpm/php.ini |
In the file, adjust settings such as:
- memory_limit (for example, 512M)
- upload_max_filesize (for example, 100M)
- post_max_size (for example, 100M)
- max_execution_time (for example, 360)
After making changes, restart the respective services:
- Apache:
| sudo service apache2 restart |
- PHP-FPM:
| sudo systemctl restart php8.3-fpm |
With your web server configured and PHP fine-tuned, you’re ready for the next stage: setting up the database to hold all your Nextcloud data.
Step 3: Setting Up the Database
With your system and web server configured, the next step is to set up a database for your Nextcloud installation. This involves creating a database and a dedicated user with appropriate privileges. Here’s how to do it:
1. Install MariaDB Server
First, install the MariaDB server package:
| sudo apt install mariadb-server -y |
2. Secure the MariaDB Installation
Run the security script to remove insecure default settings:
| sudo mysql_secure_installation |
You’ll be prompted to set a root password and make other security-related choices. It’s recommended to answer ‘Y’ (yes) to all prompts.
3. Log In to the MariaDB Shell
Access the MariaDB shell as the root user:
| sudo mysql -u root -p |
Enter the root password you set during the secure installation process.
4. Create a New Database for Nextcloud
Within the MariaDB shell, execute the following command to create a database named Nextcloud:
| CREATE DATABASE Nextcloud CHARACTER SET utf8mb4 COLLATE utf8mb4_general_ci; |
5. Create a Dedicated Database User
Create a new user Nextclouduser with a strong password. Replace your_password_here with a secure password of your choice:
| CREATE USER ‘Nextclouduser’@’localhost’ IDENTIFIED BY ‘your_password_here’; |
6. Grant Necessary Privileges to the User
Grant all privileges on the Nextcloud database to the Nextclouduser:
| GRANT ALL PRIVILEGES ON Nextcloud.* TO ‘Nextclouduser’@’localhost’; |
7. Apply the Changes
Flush the privileges to ensure that all changes take effect:
| FLUSH PRIVILEGES; |
8. Exit the MariaDB Shell
Exit the MariaDB shell by typing:
| EXIT; |
With the database set up and configured, you’re now ready to proceed to the next step: installing Nextcloud. This will involve downloading the Nextcloud files and configuring them to connect to the database you’ve just created.
Step 4: Downloading and Installing Nextcloud
This step involves installing the latest Nextcloud release on your system and setting it up. You have two options here: one using Docker (ideal for a containerized setup) and another following a more traditional, manual installation.
Method 1: Using the Official Docker Image
If you prefer a containerized approach, follow these commands:
Pull the Nextcloud Docker Image:
Download the latest Nextcloud Docker image from Docker Hub:
| docker pull Nextcloud |
Create a Docker Compose File:
For an easier management experience, create a file called docker-compose.yml with the following content:
| version: ‘3’
services: volumes: |
Launch the Containers:
Run this command to start your Nextcloud and database containers in the background:
| docker-compose up -d |
Method 2: Manual Installation from the Nextcloud Archive
If you’d rather handle the files directly, here’s how to do it:
Download the Latest Release:
Fetch the latest Nextcloud tar archive:
| wget https://download.Nextcloud.com/server/releases/latest.tar.bz2 |
Extract the Archive:
Unpack the downloaded file:
| tar -xjf latest.tar.bz2 |
Move the Nextcloud Folder:
Transfer the extracted folder to your web directory:
| sudo mv Nextcloud /var/www/Nextcloud |
Set Correct Permissions:
Adjust the ownership so your web server can access the files:
| sudo chown -R www-data:www-data /var/www/Nextcloud |
Choose the method that best fits your style. The Docker approach offers an easy setup using Nextcloud docker compose, while the manual method gives you direct control over the files. Even better, using Cloudzy’s Docker VPS plans creates an efficient platform for deploying Nextcloud via Docker, making the setup process easier.
Next, we’ll dive into configuring Nextcloud itself—setting up your virtual host, enabling SSL, and more—to complete your self-hosted cloud experience.
Step 5: Configuring Nextcloud
Now that you’ve downloaded and installed Nextcloud, it’s time to set up an Apache Virtual Host and secure your site with SSL so you can access your self-hosted cloud storage through a dedicated domain.
Creating an Apache Virtual Host File
Create a configuration file for Nextcloud:
| sudo nano /etc/apache2/sites-available/Nextcloud.conf |
Paste the Following Configuration:
Adjust the DocumentRoot and ServerName to suit your setup (for example, replacing cloud.example.com with your domain or server IP):
| <VirtualHost *:80> DocumentRoot /var/www/Nextcloud/ ServerName cloud.example.com<Directory /var/www/Nextcloud/> Require all granted AllowOverride All Options FollowSymLinks MultiViews<IfModule mod_dav.c> Dav off </IfModule> </Directory> </VirtualHost> |
Enabling the New Configuration
Tell Apache about your new configuration:
| sudo a2ensite Nextcloud.conf |
Reload Apache:
Apply the changes by reloading Apache:
| sudo systemctl reload apache2 |
Securing Your Site with SSL
For secure access, you can set up SSL. There are two common approaches: using a self-signed certificate or obtaining a certificate via Let’s Encrypt.
Option 1: Self-Signed Certificate
Enable the SSL Module:
| sudo a2enmod ssl |
Enable the Default SSL Site:
| sudo a2ensite default-ssl |
Reload Apache:
| sudo systemctl reload apache2 |
Option 2: Encrypt Certificate (Recommended for Public Servers)
Install Certbot and the Apache Plugin:
| sudo apt install certbot python3-certbot-apache -y |
- Obtain and Install the Certificate:
Replace cloud.example.com with your domain:
| sudo certbot –apache -d cloud.example.com |
Follow the prompts to complete the process.
With your Apache Virtual Host configured and SSL in place, your Nextcloud instance is set up to serve secure connections from your chosen domain. Next, we’ll move on to setting up the database to store your Nextcloud data, which ties everything together for a smooth self-hosted cloud experience.
Step 6: Finalizing the Setup
Now that your web server and PHP are configured, it’s time to wrap up your installation. This step is like adding the final touches to your project before unveiling it to the world.
Adjust File Permissions:
Before launching the installation wizard, run the following command to make sure the web server can access all Nextcloud files:
| sudo chown -R www-data:www-data /var/www/Nextcloud/ |
Access Nextcloud via Your Browser:
Open your browser and type in the URL for your Nextcloud instance, such as:
| http://your-server-ip/Nextcloud |
This will load the Nextcloud installation wizard—a friendly interface that guides you through the final setup.
Complete the Installation Wizard:
In the wizard, you’ll be prompted to enter:
- Your database details (host, name, user, and password). In a Docker setup, the database host is often set as a container name or localhost.
- An admin username and password for your Nextcloud instance.
Follow the on-screen instructions, and click the “Finish setup” button when you’re done.
Once you finish the wizard, your Nextcloud server will complete its setup, and you’ll be greeted by your brand-new Nextcloud dashboard. Up next, we’ll move on to configuring post-installation settings like cron jobs, caching, and security tweaks to keep your instance running smoothly.
Step 7: Post-Installation Configuration
After finishing the Nextcloud web installation wizard, a few final tweaks can help fine-tune scheduled tasks, performance, and security. This part concerns setting up background jobs, integrating caching with Redis, and hardening your Nextcloud instance.
Enabling Cron Jobs for Scheduled Tasks
To keep your Nextcloud running smoothly, it’s a good idea to schedule background tasks. Set up a cron job to run the Nextcloud cron script every five minutes. Open the crontab for the web server user (usually www-data):
| sudo crontab -u www-data -e |
Then add this line at the end of the file:
| */5 * * * * php -f /var/www/Nextcloud/cron.php |
Save and close the editor. This job will handle tasks like cleaning up temporary files, sending notifications, and other maintenance routines.
Installing and Configuring Redis for Caching
Using Redis can speed up your Nextcloud instance by caching data and improving file locking performance. First, install Redis and the PHP extension for Redis:
| sudo apt install redis-server php-redis -y |
Next, update your Nextcloud configuration file (usually found at /var/www/Nextcloud/config/config.php) to include caching settings. Add these lines within the $CONFIG array:
| ‘memcache.local’ => ‘\\OC\\Memcache\\APCu’, ‘memcache.locking’ => ‘\\OC\\Memcache\\Redis’, ‘redis’ => array( ‘host’ => ‘localhost’, ‘port’ => 6379, ), |
This configuration tells Nextcloud to use APCu for local caching and Redis for file locking, improving both performance and reliability.
Hardening Nextcloud Security Settings
A few extra measures can tighten your installation’s security:
- Set Correct File Permissions:
Adjust the ownership and permissions of your Nextcloud directory to restrict access:
| sudo chown -R www-data:www-data /var/www/Nextcloud sudo find /var/www/Nextcloud/ -type d -exec chmod 750 {} \; sudo find /var/www/Nextcloud/ -type f -exec chmod 640 {} \; |
- Run Maintenance Mode Commands:
Temporarily enable maintenance mode to perform any additional security checks or configuration updates:
| sudo -u www-data php /var/www/Nextcloud/occ maintenance:mode –on # (Perform any needed maintenance tasks here) sudo -u www-data php /var/www/Nextcloud/occ maintenance:mode –off |
- Review Your Web Server Configurations:
Confirm that your Apache or Nginx settings enforce HTTPS and restrict unauthorized access as needed.
With these final steps, your Nextcloud instance will efficiently handle background tasks, enjoy improved performance through caching, and be better protected from potential security threats.
Final Thoughts
You’ve now taken your Nextcloud docker setup from a blank canvas to a fully functioning self-hosted cloud storage solution. With your system updated, dependencies installed, and web server along with PHP finely tuned, your Nextcloud Ubuntu environment is ready to serve as your personal file-sharing hub.
As you continue to fine-tune your setup, experiment with advanced configurations, or explore new Nextcloud apps, it’s helpful to consider your hosting provider. A reliable and affordable VPS like Cloudzy guarantees your Nextcloud instance stays secure and responsive, making it a concrete foundation for your cloud storage needs.
For extra peace of mind, it’s wise to check out official security guidelines at Nextcloud Security Hardening and backup recommendations at Nextcloud Backup Guide. These resources help you keep your data safe and your server running smoothly.